Garage Wall Storage: The Secret to Keeping Every Inch Organized
I’ve always been someone who wants to be organized. I love the idea of it—everything in its place, a system for every item. But for years, my garage was where that fantasy went to die. There was just so much clutter. Every time I opened the garage door, it stressed me out. That changed when I discovered garage wall storage. I got my space back—and my sanity.
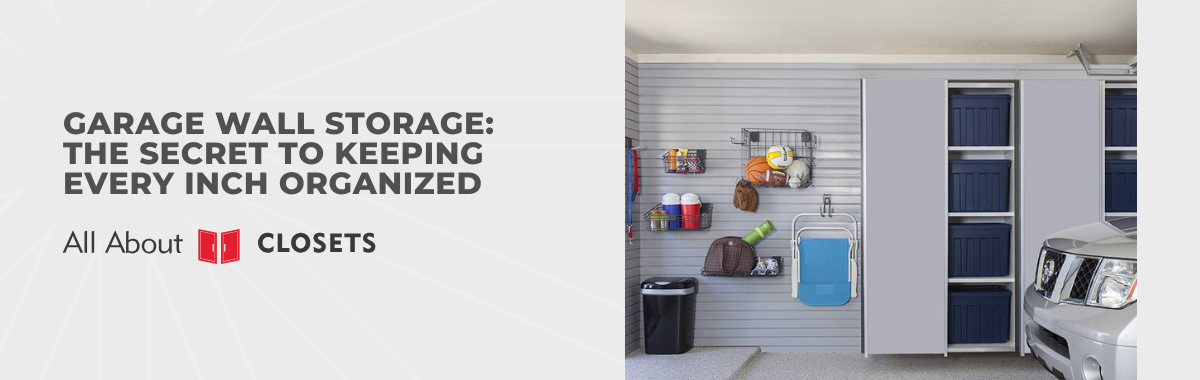
A full, purpose-driven wall storage setup turned my garage into a more functional, usable space. It completely shifted how I use the entire garage. I found extra square footage I didn’t even realize I had. Now, I can find what I need in seconds—and it actually stays that way. If you’re ready to stop battling clutter, here’s how garage wall storage helped me reclaim my garage:
- Assess your storage needs
- Select the right wall storage system
- Install hooks, hangers & specialty holders
- Incorporate shelves & cabinets for hidden storage
- Zone & label for instant accessibility
- Secure heavy & bulky equipment safely
- Enhance visibility & workflow
- Maintain & refresh your wall storage system
The difference was night and day—and trust me, it didn’t take a total renovation to get there. If you’re tired of stepping over stuff just to reach your tools, keep reading—this system changed everything for me.
Assess Your Storage Needs
Before I started buying organizers left and right (which I’ve definitely done before), I took a step back and actually looked at what I needed to store. This part is essential. One of my helpful tricks? Pull everything out onto the garage floor and group it. It’s humbling—but useful. Here’s how I grouped my items:
- Tools (both power and hand tools)
- Sports gear (helmets, balls, yoga mats)
- Gardening equipment
- Car supplies
- Paint cans, cleaning supplies, random odds and ends
I grouped them by type, frequency of use, and bulkiness. That helped me figure out where my current system of disorganization was failing me.
Select the Right Wall Storage System
Once I knew what I needed to store, I looked into different wall systems. Here’s what I invested in:
- Pegboards: These are great for small tools, but honestly not strong enough for my heavier stuff.
- Track-Mounted Systems: I finally got flexibility and worked well for hanging long-handled tools like brooms and rakes.
- Slatwalls: I went with a PVC version that’s durable, easy to clean, and holds all sorts of accessories. I use it for everything from drill chargers to extension cords.
What I’ve learned: match the system to your stuff—not the other way around. It made all the difference.
Install Hooks, Hangers & Specialty Holders
This part was honestly kind of fun—customizing the setup with all the little attachments. I use heavy-duty hooks for our bikes, shovels, and ladder. Those things eat up floor space if you let them, so hanging them securely freed up half a wall. Also, I installed a magnetic strip over my workbench to hold screwdrivers and drill bits, so I can grab them mid-project.
And one of my favorite finds? A power tool cradle with slots for my drill and sander plus cord hooks. That one organizer solved a constant tangle of cords I used to fight every weekend.
Incorporate Shelves & Cabinets for Hidden Storage
Some stuff just shouldn’t be left out in the open. Paint cans, cleaning products, random cords—they need a home and a door.
I added shallow cabinets above my workbench for chemicals and small supplies. Lockable, too, which I like for safety. And for fast-access stuff, open shelves are perfect. I store bins of screws, nails, and glues there, all labeled. I also always recommend using clear bins when possible—you can see exactly what’s inside without opening a thing.
Zone & Label for Instant Accessibility
One of my helpful tricks that’s stuck? Creating zones. I split my wall into sections:
- DIY tools
- Automotive supplies
- Yard & garden
- Sports gear
Everything stays in its lane, and it helps the whole family know where to put stuff back. I added color-coded labels and some fun icon decals (think wrench for tools, glove for gardening). Even my kids can find what they need without asking me endless times.
Secure Heavy & Bulky Equipment Safely
If you're storing something heavy, don’t mess around. I made sure every wall-mounted rack hit at least two studs. No shortcuts. I also used anti-tip brackets on our tall cabinets and double-checked every screw and anchor.
Weight distribution matters more than I expected. I try not to load everything onto one side of the system—balance it out to avoid stress on the structure. It’s held up beautifully so far.
Enhance Visibility & Workflow
There’s nothing worse than a clean, organized garage you still can’t see into. So, I added under-shelf LED strips above my workbench and motion-sensor lighting near the garage entry door. Game changer.
I also placed my most-used tools and items at eye level for easy access. No bending. No reaching. Just grab and go. For the high shelves? I keep a small, foldable step stool nearby. Lightweight but gets the job done.
Maintain & Refresh Your Wall Storage System
I’ll admit—organization isn’t a “set it and forget it” situation. Every few months, I do a quick sweep, tightening hardware and wiping everything down. Seasonal items also get shifted a bit for easy access.
I also make sure to update labels and swap containers as needed. My needs evolve, and so should the system. But with a solid wall setup, it’s easy to adapt. I just slide a few accessories around and I’m good to go.
Conclusion
Garage wall storage is my secret to making my space work better. Now, everything I use has a place. Nothing’s buried or forgotten. Reclaiming all that floor space has made my garage a safer, organized place I can use to the fullest. If you’ve been dreaming of a more functional garage, take it from someone who’s tried the bins, the shelves, and the floor piles. Garage wall storage was the system that finally stuck.

George obtained a Master of Science Engineering Degree from New Jersey Institute of Technology. After graduation, he worked at AT&T Bell Labs and Lucent Technologies after the company split. With an extensive background in construction management and ergonomic space design, spanning residential and commercial, designing and installing closets in New Jersey is second nature for him.